Trezor.io/Start® | Trezor Suite App (Official) Trezor®
In today's fast-paced digital age, securing your cryptocurrencies is more crucial than ever. Whether you're a seasoned investor or just entering the world of digital currencies, having a secure wallet is essential. Trezor is one of the leading names in cryptocurrency hardware wallets, offering a safe and reliable way to store your crypto assets. In this article, we'll guide you through the process of getting started with Trezor, step by step, through the official Trezor.io/start portal.
Why Choose Trezor for Your Cryptocurrency Storage?
Before diving into the setup process, it’s important to understand why Trezor is the preferred choice for many. Trezor is a hardware wallet, meaning it stores your private keys (which give you access to your cryptocurrencies) offline, away from the dangers of hacking or malware. This makes Trezor far more secure than online wallets or exchanges that are more vulnerable to cyber-attacks.
Trezor offers several models like Trezor Model T and Trezor One, both of which are compatible with major cryptocurrencies such as Bitcoin, Ethereum, and many altcoins. Its user-friendly interface and transparent security protocols make it a top choice for crypto users worldwide.
Step-by-Step Guide to Setting Up Your Trezor Wallet
Setting up your Trezor wallet is a straightforward process. Here’s how you can get started through the Trezor.io/start page.
1. Visit Trezor.io/start
The first step to setting up your Trezor wallet is visiting the official Trezor.io/start page. This page provides direct access to all the necessary resources to configure your hardware wallet. You can choose the Trezor model you own (either Trezor One or Model T) and follow the specific instructions based on your device.
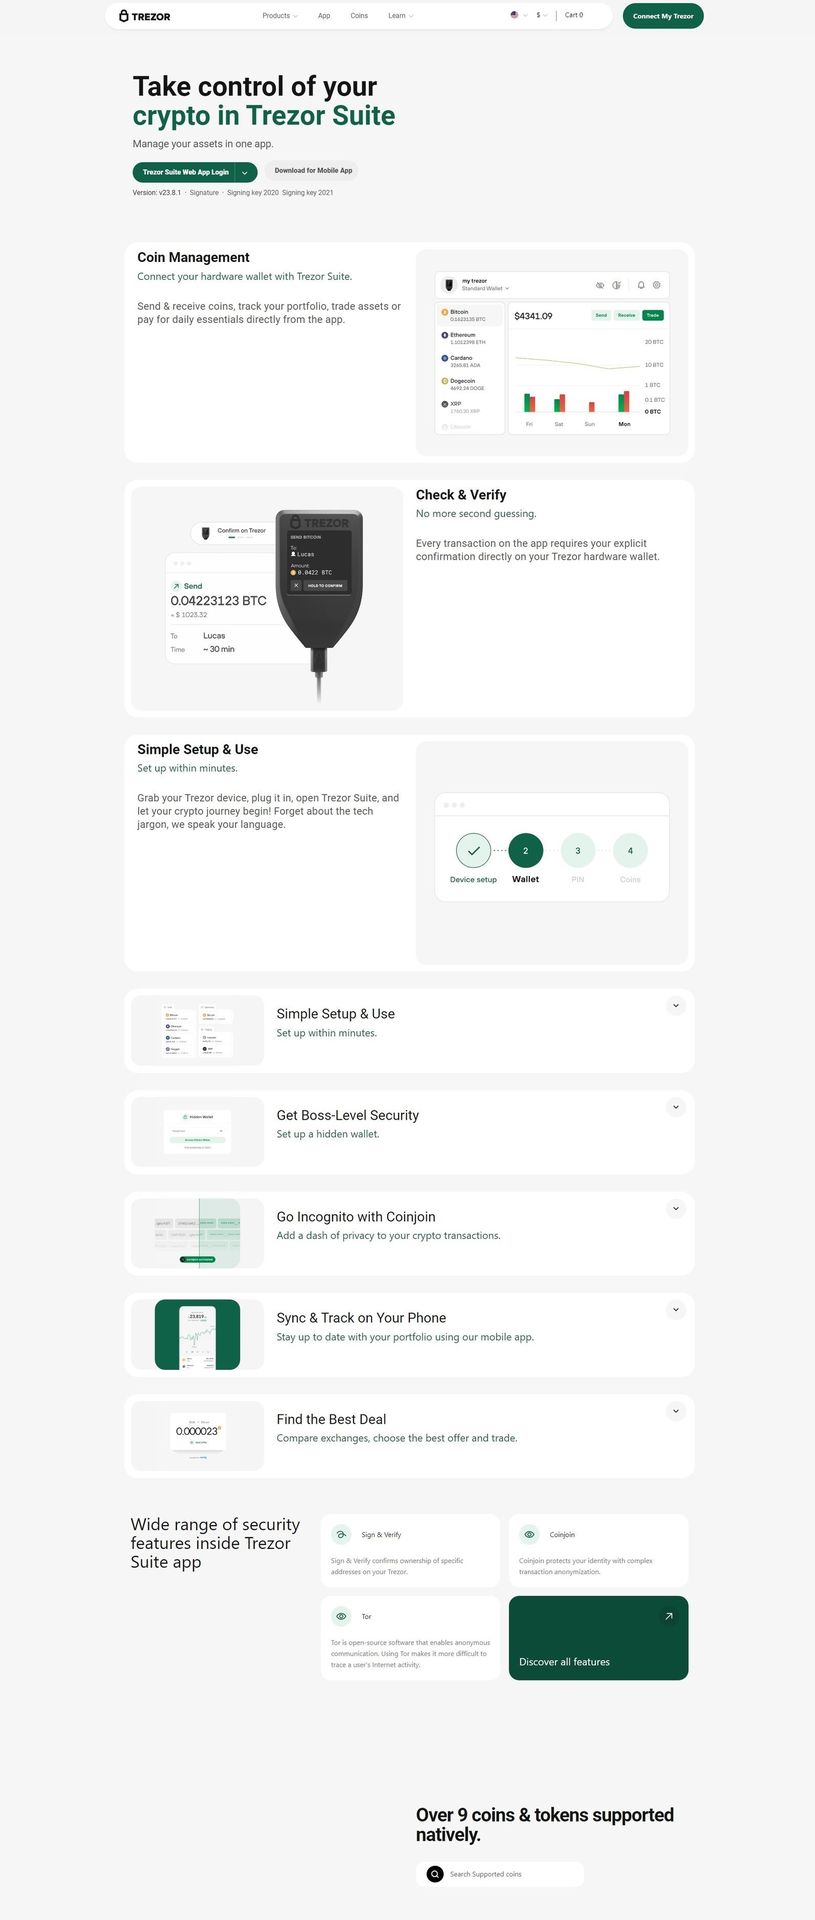
2. Download and Install Trezor Suite
The Trezor Suite is the software that allows you to interact with your Trezor device and manage your crypto assets. Trezor Suite is available for both Windows, macOS, and Linux, making it accessible for almost any user. The Suite offers an intuitive interface to check balances, send or receive cryptocurrencies, and even initiate advanced security options.
Visit the Trezor Suite download page and download the appropriate version for your operating system. Once installed, connect your Trezor device via USB to your computer and open the Trezor Suite application.
3. Create a New Wallet or Recover an Existing One
Once you’ve installed Trezor Suite, you’ll be prompted to either create a new wallet or recover an existing wallet using a recovery seed phrase.
- New Wallet: If you’re setting up your Trezor for the first time, you’ll need to create a new wallet. The Trezor device will generate a 24-word recovery seed phrase, which you must write down and store securely. This recovery seed is crucial for restoring your wallet in case you lose access to your Trezor device.
- Recover Wallet: If you’re recovering an existing wallet, simply input the recovery seed phrase, and your assets will be restored to your new Trezor device.
4. Set a PIN for Additional Security
For an extra layer of security, Trezor allows you to set a PIN. This PIN must be entered each time you connect your Trezor device to the Trezor Suite. Even if someone physically gains access to your device, the PIN ensures that they won’t be able to manage your funds without your knowledge.
5. Add Cryptocurrencies to Your Wallet
After setting up your PIN, you’re ready to start using your Trezor wallet to store cryptocurrencies. Trezor supports a wide variety of cryptocurrencies, including Bitcoin, Ethereum, Litecoin, and many ERC-20 tokens.
To add cryptocurrencies to your wallet:
- Click on the "Receive" tab in the Trezor Suite.
- Select the cryptocurrency you want to receive.
- Copy the wallet address provided and share it with the person or exchange sending the funds.
Once the transaction is completed, your balance will be updated in the Trezor Suite.
6. Send Cryptocurrencies
To send cryptocurrencies:
- Click on the "Send" tab in Trezor Suite.
- Enter the recipient's wallet address.
- Specify the amount of cryptocurrency you want to send.
- Confirm the transaction on your Trezor device by reviewing the details and physically pressing the confirmation button.
7. Regularly Update Your Trezor Firmware
Trezor is committed to maintaining the security of its devices through firmware updates. These updates improve security, add new features, and ensure compatibility with new cryptocurrencies. It’s recommended to regularly check for firmware updates via the Trezor Suite and install them when available.
3rd Party Resources for Additional Guidance
If you encounter any issues during the setup process, Trezor offers an extensive Support section on their website. You can also refer to trusted third-party guides like CoinBureau or CryptoCompare for additional tutorials and user experiences with Trezor devices.
Furthermore, websites such as Reddit host active Trezor communities, where users share their insights, troubleshooting tips, and recommendations for best practices.
Advanced Security Features
Trezor is designed for advanced users who require more security options. Some of the advanced features include:
- Passphrase: For users who want an extra layer of security, Trezor offers an optional passphrase feature. This works in conjunction with the recovery seed phrase, providing a secondary password that is only known to you.
- Shamir Backup: Available for Trezor Model T users, the Shamir Backup is an advanced security feature that allows you to split your recovery seed into multiple shares, which can then be stored in different locations.
Conclusion
Setting up your Trezor wallet via the Trezor.io/start page is a straightforward process that ensures the safety and security of your digital assets. Whether you’re a beginner or an experienced crypto enthusiast, Trezor provides a user-friendly platform to manage your portfolio securely. With additional features like a PIN, recovery seed, and firmware updates, your cryptocurrency holdings remain protected from external threats.